Wednesday, August 10, 2011

Tea Party Decor

I was in charge of the decor for my churches Mother/Daughter Tea back in May. We were on a very tight budget, but I still wanted it to be girly and special. I cut out various shapes on my Silhouette, but forgot to get pictures of most of them. :( Then I bought a 2 flats of flowers for $1.99 at Rite Aide and added them to plastic vases I had found at Target (2 for $1) and added the die cut shapes to them.

This first picture here is hard to see the shape, but lets you see the flowers in the pot. The shape is of two little girls sittin at a table having tea.
This next one is a teapot. We also had teacups and the word Mother.

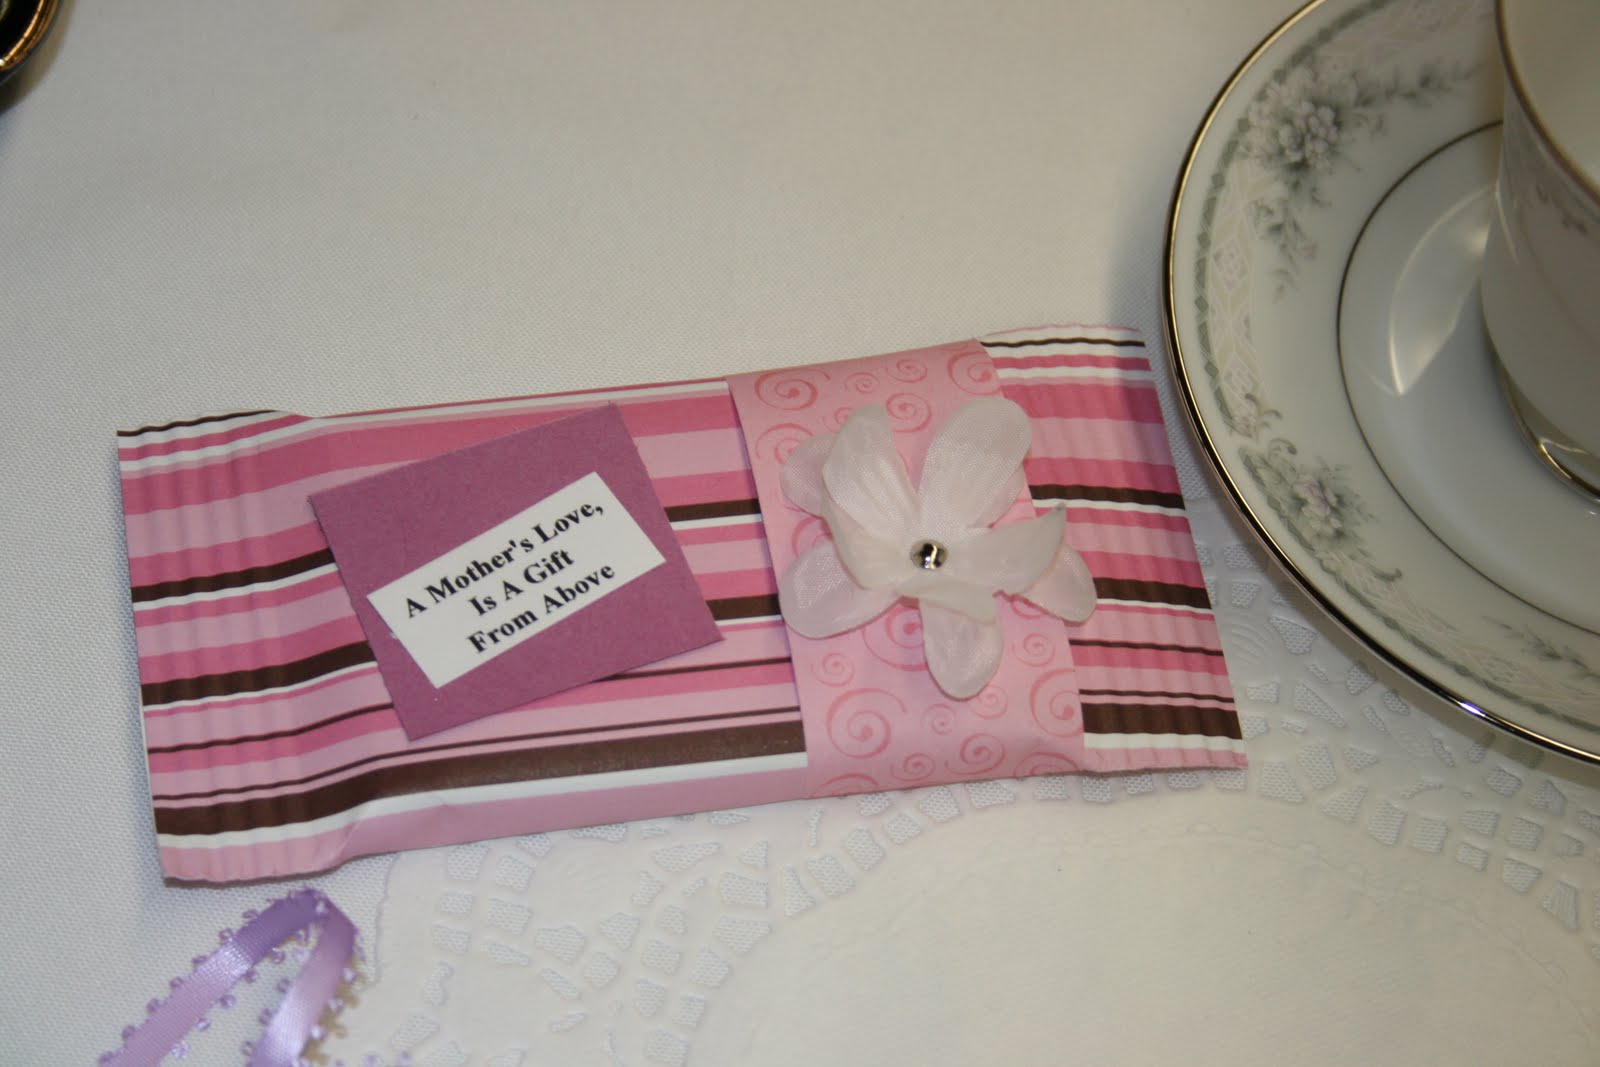
I really like the favors. It is a kit-kat bar wrapped in scrapbook paper and crimped ends. Then I took another strip of paper and wrapped it around and topped it with a fabric flower. Our them was A Mother's Love, is a Gift from Above.


Monday, August 8, 2011

Turtley Awesome

I made this card for my dad's birthday back in February. I love the turtle's big eyes! After I cute out the turtle's two layers, I ran the shell thru my cuttlebug (I forget the embossing folder's name) to give it a more textured look. Then I put orange paper down first, with the desert print paper on top and added the turtle with pop dots. The stamp is from My Pink Stamper.

Friday, August 5, 2011

Boy or Girl?

My brother and sister-n-law are expecting their third child soon and the gender is to be a surprise. So when she had her baby shower a few weeks ago, I made this card to incorporate both sexes. The card turned out cute, but was a royal pain to make. The onesie has so many small details to it that the silhouette just couldn't cut them out on these tiny die cuts. So I had to ungroup the onesie on my computer screen and remove all but the heart and lines around the diaper area. The die cut onesie's were cut out at 1 1/2 inches each.


Thursday, August 4, 2011

Cowboy Hat Invitation

This is the last thing I have to post on from my son's rodeo party. This is the invitation that was sent out to all the guests. It is pretty basic, I just cut out the three pieces on my Silhouette and glued them on.

The front of the card flips up to reveal the wording inside, which I printed out and cut with scalloped scissors.


Friday, July 29, 2011

Hogs & Kisses

Just a fun little card I made for my mom. The blue paper on top(resembling the sky) is from my Sweet Treat paper pack and it has a sparkly diamond shape, the bottom (for mud) is chocolate brown and the pig was done in three layers. The first layer is black and you can see the eyes, plus it gives the pig more support/thickness. Then the hot pink, topped with the light pink. I finished it off with My Pink Stampers stamp Hogs & Kisses. I also smugged a little black ink with my fingers on the pig to resemble dirt.


Thursday, July 28, 2011

Signs

I made a couple of signs for my son's rodeo party and due to my being in a hurry, I learned a valuable tip that I thought I would share with you.

Normally, I would cut out my letters on my Silhouette and then I would adhere them to my card stock, trying my best to keep them equally spaced and straight. Well, because I was in a huge hurry, I decided to throw away the letters and just place the paper they were cut out of on top of a solid sheet of paper. Here I have the black paper on top of the cream paper.

Then I took the small pieces from the letters A, R and O and adhered them on where they should be. As you can see, this only took a minute to do and the letters are equally spaced and straight. I now know I will be doing all my signs this way!

I did the same thing for my Cowboy Cafe sign, just in opposite colors. Here, I cut the letters out of the cream colored paper and adhered it to the black paper. (please excuse the blue painters tape, I ran out of masking tape and had no time to run to the store before the party. Ooops!)


Wednesday, July 27, 2011

Cowboy Table Centerpieces

If you read my post yesterday, than you have seen some of these die cuts before. Before I put them into picture frames and hung them on my son's wall, they were used as decorations for his party. Such a simple way to decorate and better yet, I can re-use the hay bales for October/November months!

Here is how I made them. I bought straw hay bales at Michael's, wrapped red/white gingham ribbon around them and fastened the ribbon with quilting needles. Then I cut up bunches of silk flowers and stuck them in the hay bale. The die cuts were made on my Silhouette machine and I taped it to a kabob stick and stuck it in the middle. Easy peasy!

Cowboy with lasso on horseback. (The bag behind it was filled with tortilla chips)
A close up of the boot. I used silver stickles on the spur to make it shine.

A cowboy on a bucking bull was on the food table.


Cowboy on a bronc horse with the wording 8 second ride.


The calf roping required two kabob sticks due to it being wide.


A close up shot if the details.


I can't wait until Fall to transform these hay bales into decorations for my porch! I love that I was able to use the die cuts as party decorations, as well as, wall decor for my son's room and the hay bales can be used again for decor during the Halloween/Thanksgiving season year after year.