As I said in my previous post, I made 4 themes of greeting cards for a recent boutique. Here is one of them, the Fruit Theme. I sell these in a pack of 8 with envelopes, housed in a clear plastic box. If you are interested, please contact me at ediving@hotmail.com. I am also willing to sell them individually too. All die cuts are given a 3-d look using pop dots.
The Apple. Red card base, with white cardstock inside to write on. I embossed the top part to look like leaves, put stickles on the seeds and stamped it with Apple of My Eye.

The Pear. Dark green card base, with white cardstock inside. Embossed with pears, strip of brown cardstock with ivory ribbon and stamp says What A Pear!

Strawberry. Green cardstock, topped with a silky smooth summer print paper. Inside of the card, it is stamped with You're Berry Special.

Grapes. Plain white cardstock, with 2 layers for the grapes. Green paper with white polka dots and purple ribbon. Stamp says Have a Grape Day!

Watermelon. This card screams Summer. Green cardstock, red/white plaid top, ivory bottom and a red/white stitched ribbon. Stamp says You're One, in a Melon.

Cherry. Red cardstock. Black cardstock embossed with cherries. Heart on cherry is covered in stickles. Stamp says Life is Like a Bowl of Cherries.

Peach. Rustic orange cardstock. Green base and a strip of printed rustic orange. Stamp says You're a Peach!

Lemonade. Yellow cardstock card. Light blue base with a summer plaid bottom. The pitcher is made using velum, lemonade is a yellow/white print paper and lemons are two shades of yellow. Stamp says When Life Hands You Lemons...

The detail on each card is amazing. The pictures just don't do them justice, but trust me when I say you won't find cuter cards in the store and you can't beat homemade products.
 but then decided that they needed something more. So I went ahead and made cupcake toppers for them. I put mine in a cupcake/muffin pan, but if I was throwing a baby shower, I would arrange them on a treat stand and then display them on the desert table.
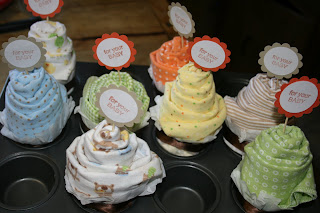 An up-close picture of the cupcake topper.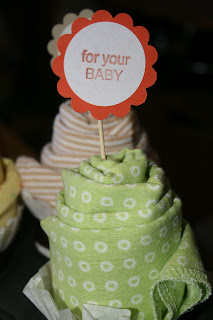
 but then decided that they needed something more. So I went ahead and made cupcake toppers for them. I put mine in a cupcake/muffin pan, but if I was throwing a baby shower, I would arrange them on a treat stand and then display them on the desert table.
 An up-close picture of the cupcake topper.


