My 5 year old wanted a Rodeo themed birthday party this year. I decided to go with the colors brown & pink. I was pleasantly surprised to find paisley print paper & ribbon, so I also incorporated paisley into the them.
I used my Silhouette to make all the paper decor. Here is the goodie bag using a brown paper lunch bag with a horseshoe on the front.
For the Watering Hole, I made a sign & stuck into a bale of straw. I also glammed up the drink dispensers with the pink/brown/paisley ribbon.
A close up of the Cowboy Cafe sign.
One of my old boots served a great flower vase!
I love the Banner I made. I will have to use this for all future girl birthday parties. Just need to make a name one for my other daughter.
I didn't get any pictures of the centerpices. :( But they were mini straw bales, wrapped with the brown/pink/paisley ribbon and then had cowgirl & cowboy paper silhouettes stuck into them. I also added pink & white flowers to them.
The sign that greeted all our guests.
I tried my hand at making chocolate caramel pretzels, which were much harder than I anticipated, and then totally forgot to add them to the goodie bags.
Sunday, October 28, 2012
Wednesday, September 5, 2012
Cannings Done!
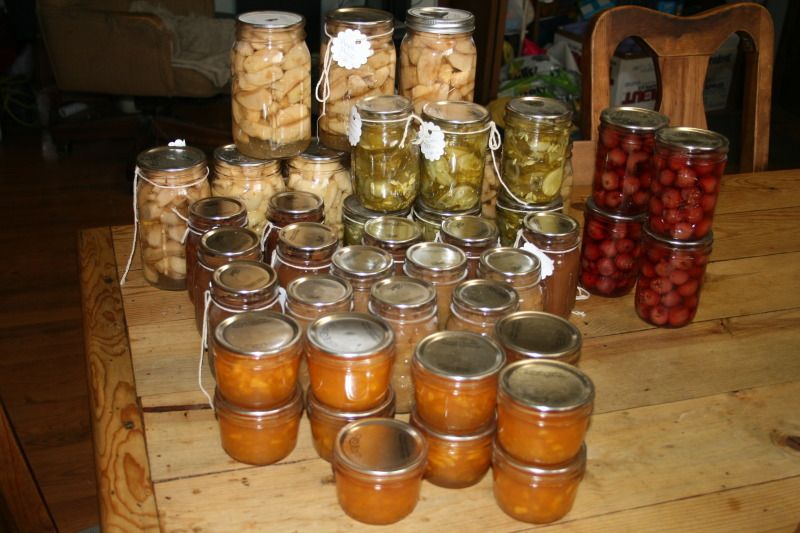
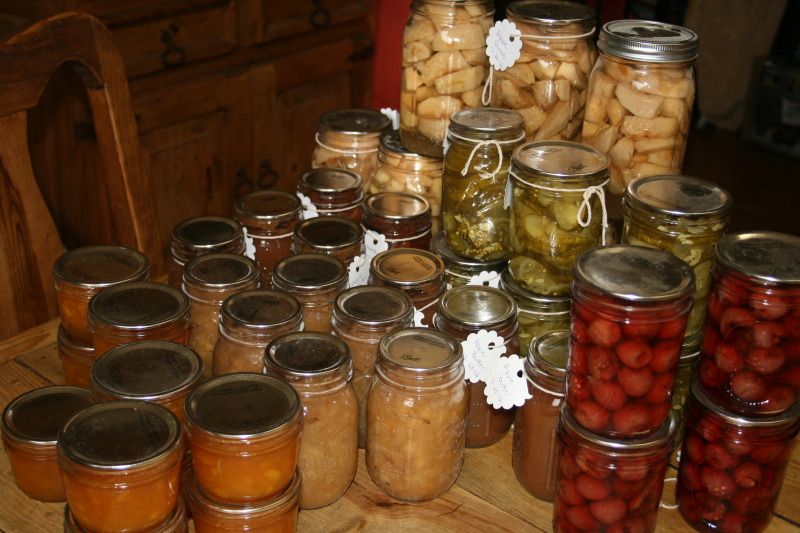
Here is the final out come of my 1st year canning (minus a few jars). 10 of the cherries jars are down in the basement and we have already opened/eaten some of the pickles, applesauce, apple butter, and jam. I was hoping to make orange marmalade, but never did get around to it. Maybe next year. One thing I have learned, it I need a larger stock pot to hold more cans and an apple peeler/slicer thing. These will definitely help the process go much faster!
Friday, July 27, 2012
The History of 'APRONS'
The History of 'APRONS'
I don't think our kids
know what an apron is. The principal use of Grandma's apron was to protect the dress underneath because she only had a few. It was also because it was easier to wash aprons than dresses, and aprons used less material. But along with that, it served as a potholder for removing
hot pans from the oven.
It was wonderful for drying children's tears, and on occasion was even used for cleaning out dirty ears.
From the chicken coop, the apron was used for carrying eggs, fussy chicks and sometimes half-hatched eggs to be finished in the warming oven.
When company came, those aprons were ideal hiding places for shy kids.
And when the weather was cold, Grandma wrapped it around her arms.
Those big old aprons wiped many a perspiring brow,
bent over the hot wood stove.
Chips and kindling wood were brought into the kitchen in that apron.
From the garden, it carried all sorts of vegetables.
After the peas had been shelled, it carried out the hulls.
In the fall, the apron was used to bring in apples that had fallen from the trees.
When unexpected company drove up the road, it was surprising how much furniture that old apron could dust in a matter of seconds.
When dinner was ready, Grandma walked out onto the porch, waved her apron and the men folk knew it was time to come in from the fields to dinner.
It will be a long time before someone invents something that will replace that 'old-time apron' that served so many purposes.
Send this to those who would know (and love) the story about Grandma's aprons.
REMEMBER:
REMEMBER:
Grandma used to set her hot baked apple pies on the window sill to cool. Her granddaughters set theirs on the window sill to thaw.
They would go crazy now trying to figure out how many germs were on that apron.
I don't think I ever caught anything from an apron - but love.
Peach Jam
We were generously given a couple flats of peaches by a neighbor. Many of them were eaten in their natural glory, but when they started to get soft, I knew it was time to preserve them. I started off by boiling water and then putting the peaches in for about 30 seconds and then quickly moving them to a bowl filled with ice water to shock them.
I found the best way to peel them is by simply using a paper towel and gently rubbing the peach. The peel comes of super easily. Once they are peeled, then you can slice around the peach to remove the pit and finely chop them up into small pieces or cut them in half and freeze.
Take 4 cups of chopped peaches and
add 2 tablespoons of lemon juice.
Next, add one box of pectin to 1/4 cup of sugar, mix and add to peaches. Stir until boiling and then
add another 3 1/4 cups of sugar and return to a full boil, stirring constantly for one minute.
Remove from heat and skim off the foam.
There shouldn't be all that much foam, but by removing it, you will have a much cleaner looking jam.
Ladle your mixture into jelly jars and process.
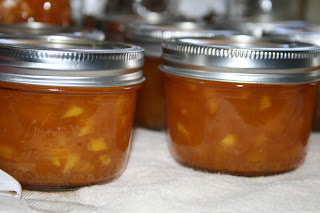
and you will end up with this beautiful and delicious summer jam to enjoy all year long.
Thursday, July 26, 2012
Apple Butter
Making Apple Butter is very similar to making applesauce. You cook down the apples
and puree it in the food processor, just like you would applesauce.
But here is where it changes. You put the sauce into your crockpot and add sugar, cinnamon, nutmeg and cloves. Stir and set the timer on low for 4-5 hours.
Be sure to put the lid on, but not all the way. The lid is on to keep the splatter down and it is cracked open to allow any liquid to evaporate, which is what will make it thick and turn into apple butter.
You can see how the color changes to an almost caramel and how it thickens.
Then put it into your sterilized jars and process. It is delicious on bread, pancakes or muffins.
Wednesday, July 25, 2012
Apple Slices
I canned 2 quart sized jars of raw apples. I chose to can them raw, with the hopes that they will be a bit crisper when I go to use them. I also didn't add any spices or make a syrup, because I prefer to add fresh spices to my apple pies when I bake them.
To can raw apple slices, all you do it core and peel the apple and then I cut them using an apple slicer to get uniform apple slices. Pack them into a sterile jar, add boiling water and process in either a pressure canner or water bath.
To can raw apple slices, all you do it core and peel the apple and then I cut them using an apple slicer to get uniform apple slices. Pack them into a sterile jar, add boiling water and process in either a pressure canner or water bath.
Tuesday, July 24, 2012
Applesauce
Yesterday, I showed you how to make chunky applesauce. Today, it is unsweetened smooth applesauce.
Peel, core and dice your apples and cook them down with 1/2 cup of water.
Once the apples are soft, drain out an excess water and put them into your food processor
and puree until smooth.
Put it into your canning jar and process. Of course, you could always add sugar and/or cinnamon for some added sweetness if you desire.
Monday, July 23, 2012
Chunky Applesauce
We recently acquired three large boxes of Washington Red apples. Now these apples are not the crispest of all apples, but I was not about to let them go to waste. Over the next few days I will post about 5 different ways I used up these apples. Today, we will focus on chunky applesauce.
I gathered my helpers and we got busy peeling, coring and dicing the apples. Nothing went to waste, as we gave all the peels and cores to our horses and soon when I get my compost pile going, half of our fruit/veggie scraps will go to the horses and the other half will be tossed into the compost. Great way to go green!
I put the apples (about 40) into a large stock pot with 1/2 cup of water,
took 1 cup of sugar, 1/4 cup of cinnamon and a tablespoon of nutmeg
and dumped them on top of the apples.
Combine everything and cook until the apples are soft.
Then take a potato masher and mash the apples until you reach the consistency you like.
Put them into your sterilized jars and process them. The end result is some very delicious chunky applesauce that can be eaten straight out of the jar, warmed up and served with vanilla ice cream or even used in an apple crisp.
Monday, July 9, 2012
Sidewalk Paint
Kids were bored and I was busy doing housework, so I had not time to entertain or take them any where. What to do? Remember several posts on pinterest on making your own sidewalk paint!
I grabbed some cornstarch & food coloring out of my pantry and went to work.
Poured a couple of tablespoons of cornstarch into a few holes in my muffin pan and added some squirt of food coloring. I only had the gel kind on hand, but obviously the liquid would work too (better in my opinion).
Than add a bit of water and stir. The teal is completely stirred up and the yellow is a work in progress.
I made 6 different colors, which resulted in
my kids having over an hour of fun! And of course, you realize this means mommy also had an hour of peace & quiet. Ahhhhh!
It works just as well on paper, as it does
on the sidewalk.
The best part is it can all be cleaned up by the spray of a hose, which I will have the kids to do, allowing them to cool off in the hot summer sun and add another 30 minutes or so of peace for me. Win, Win!
Wednesday, June 27, 2012
Three Wedding Cards
I have three wedding to attend between now and November. The first wedding is this Saturday, so I decided to go ahead and make all the cards. As you can see, the cards are all have the same die cut couple, but different paper.
This wedding is going to be done in black, pink and gold. So I made the card with a black card base, a gold layer, followed by a pink print layer and finished it off with a shear gold ribbon.
The inside has the same gold paper, layered with white cardstock and stamped with two sentiments.
The next wedding's colors are red, black and white. This card has a black card base, followed by a white layer and then on top of that is a red card stock that I embossed with swirls. The "Thinking of...." sentiment is on front this time and I had no ribbon to match, so I did it without.
Inside of the red, black & white card, as well as the next card, I just put in white card stock and the sentiment saying "On Your Wedding Day".
This last card is actually for the wedding I am attending this Saturday and her colors are purple with a touch of green. The card base is green, followed by a print that has purple, green, brown and a touch of blue and I added a purple ribbon to the bottom.
I really like how similar, yet different these cards are all due to the change of colors, making them very personal for each couple.
Subscribe to:
Posts (Atom)


